July 30, 2014

Bead Table Wednesday: Trendy Pineapples

I'm taking a workshop on pattern design and every two weeks we get a trend report. This week's report included tropical inspirations and I have to say pineapples struck my fancy! At first I was like, pineapples? Really? But then I did a little pinning and I was like, heck yeah - what else BUT pineapples? So I will get to the watercolors this weekend but the clay was begging to be transformed into pineapples. So of course, I listened to my crazy, sometimes off-her rocker muse and made some pineapple beads. And then I made this bracelet for myself because I seriously am in love with pineapples now! 

Pineapple Express


See, you were scared weren't you? Pineapples. Yep, pineapples. Love the artsy hand-drawn on on the t-shirt. And pineapples paired up with stripes - yeah, that's the ticket for me! I love it. (Click on the little icons above for links to each item.)

You can find the instructions for the bracelet here. For the accent beads I used one of my wobbles, bead caps from Gardanne, Green Girl Studios and Vintaj along with Czech glass. 


I only made two extras of these, so if the pineapples grabbed your attention too head on over to my Etsy shop and start singing, 
"If you love pina coladas and gettin' caught in the rain..."

I made a few tiny charms for earrings, thinking I need to a pendant now too. These would be so stinkin' cute with my beach house bead. Am I right? In case you are wondering that's my pineapple sketch in the background.


And of course, I had to make matching disk beads! These can all be found in my Etsy shop.

So what's on your bead table? Leave a link in the comments below to your blog or use #BeadTableWednesday on Instagram.  Follow me on Instagram @humblebeads.

July 28, 2014

Wire Oval Earrings Project & Giveaway Winner

Need another earring inspiration? This one uses steel wire and a tiny spacer bead to create earrings that pack a punch!

Supplies:
8-10mm polymer clay spacer beads
50" annealed steel wire
2 gunmetal earwires
Steel wool and Renaissance Wax

Tools: 1" wooden dowel, wire cutters, round and chain nose pliers.

Prep your wire:
Run the steel wool down the length of the wire, varying the amount of polishing as your go up and down the wire with the steel wool and seal with light coat of wax. 

Directions:
1. Cut 25" of wire. Leave a 4" tail on one side of the wire and start wrapping the wire around the wooden dowel, wrap 5 times. Position the wire so the ends are on the top, and squeeze the sides of the wire to form an oval.
2. At the center of the top of the oval, wrap the smaller wire around the ovals three times to secure them. Pull the small end of the wire straight up.
3. Wrap the longer end of the wire around the small end of the wire and create two tight wraps. String on the spacer bead, trim excess wire and create a simple loop at the top of the spacer bead. Continue wrapping the long end of the wire several times under the spacer bead to fill in any gaps.
4. Open the loop at the top of the earring and slip on the earwire, close loop. 

 
Resources: Humblebeads: Tiny Peacock Spacers
 Steel wire: Ace Hardware stores. 
Earwires: Rings & Things.

Thank you to everyone who played along last week and pinned their favorite earring designs. By the power of the random.org generator the winner is Catherine Vrchota. Catherine, please email for your $30 gift certificate.

And because I so appreciate
everyone else playing along last week, if you pinned 3 or more pairs of earrings email me for a special $5 gift certificate to use on your next order. 


July 25, 2014

20 Earring Inspirations

From quick and easy gifts to the bread & butter at craft shows - you can never have too many earrings or too many earring inspirations! Here are 20 fabulous designs featuring Humblebeads

One of the best things about using Humblebeads for earrings - they weigh next to nothing, so even bold designs can be worn all day.

Did you know most people who have sensitivity to earring wires are having a reaction to the nickel in base metal?  A simple and affordable solution are nickel-free natural brass earwires. I couldn't wear earrings for years until I discovered Vintaj's brass earwires.  People who are highly sensitive find that niobium earwires are another great choice.

Feathers & Leaves
Leaves and feathers are still quite popular, the geometric dagger shapes are on trend for summer and fall. 

Feather charms mixed with enameled headpins and glass.


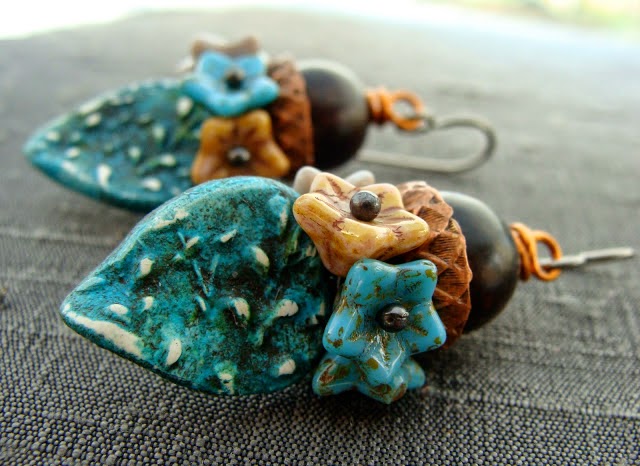
Willow Headpins mixed with Czech glass, copper acorn bead caps and buri nut beads.

Frosted Leaf Charms mixed with jump rings and faceted brass beads.


Headpins make super quick earrings - you can get creative with the wire like I did in the Wire Rosebud Tutorial on my website. 

Charming Pairs
Looking for something charming? Try creating earrings with tiny charms, you can keep them simple with a little wire-wrapping or jump ring embellishments or pair them up with beads. 

Pair Falling Leaf Charms and wire for a simple design. 

 Or get fancy with the wire and create nests like I did in this pair with my Meadowlark charms.

Try creating a pair styled after my Spring Forest Earrings

Layer tiny charms with metal charms like I did with these Tiny Acorn charms and brass leaves that have been colored with a patina.

Sandy Shores Starfish Charms are perfectly paired up with copper wire spirals and copper rings for a surf and sun inspiration. 

Wire & Humblebeads
Wire and Humblebeads opens up a world of design possibilities. From making your own earwires to creating wire elements, get creative with wire in all different gauges and metals to see what you can create.

Use 20 gauge half-hard sterling silver wire to create your own earwires to embellish with beads. For this pair I used Willow Disk beads with a bit of sari ribbon that was ruffled unto the wire. 


A little bit of sterling silver wire and disk beads and you can create the spiral earrings in my Candy Cane Earring tutorial

Use wire to transform these Matchstick Charms into flower stems. Click here for the tutorial.

I love making wire nests and used steel wire with my Tiny Eggs for the cutest earrings ever!

Disk Beads & Spacers
Dangles, dangles, dangles - I pair up tiny wobbles with pewter charms and beads for some of my favorite earring designs. I love mixing brass with the pewter, they warm up the design and offer more choices for matching your earrings with other jewelry. 

Try stacking tiny spacer beads for a fun effect like I did in the Totem Earring tutorial here.

 Pair up my tiny wobble beads for a interesting little touch of color to your earring designs.

Tell a story with your bead shapes. The Willow Disk beads in this design play the part of meadow while the copper beads look like beehives and the tiny brass faceted beads like honeycombs. 

Another Willow Disk bead (can you tell I like them for earrings!) are matched up with pewter charms that have been given a patina treatment with Swellegant paint. I used a ball headpin to create a wire bail for the flowers.

Go long with a dramatic charm like these copper oak leaves paired up with Bittersweet Disk beads. The results, pure fall inspiration!

Hammered Metal and Disk Beads
Whether you are cutting your own metal pieces or using commercially offered blanks, pull out those texturing hammers and sheets and go to town making your own focals for earrings.

I pulled out some copper and a texturing hammer and paired the rectangles up with disk beads for a very artsy combination.

This layered look started with Arte Metal blanks for Vintaj and bronze dangles from Nina Designs. I textured the blanks with a ball peen hammer and paired them up with a set of my Art Nouveau Peacock Disk beads.

Pin to Win! 
Since today is July 25 I'm feeling a little Christmas in July-ish and rather gifty.  So I'm going to give away a $30 Humblebeads gift certificate this weekend.

To play:
Pin any 3 of these earring inspirations to Pinterest and leave a comment here letting me know you did. On Sunday morning I will randomly pick one comment as the winner.

Share Your Creations:
Bonus entry: Use the Inlinkz tool below to share a pair of earrings you've made using Humblebeads. (Each link will count as one bonus entry.)


July 23, 2014

Bead Table Wednesday

So this is how I started my morning: working on a few pendants to take with those bracelets from yesterday down to my local art center.

They teach yoga classes there and I have these lovely zen-inspired word beads that I made earlier this summer. I'm hoping these speak to those ladies who are there each week to unwind.

I had the pendants at Bead & Button, but just added them to my Etsy shop today.  Maybe you'd like to make necklace that speaks to you!

So what's on your bead table today? 
Share in the InLinkz tool below for Bead Table Wednesday or on Instagram by using #BeadTableWednesday

July 22, 2014

Designing Dilemma

So without any grand plan last night I sat down to make some new memory wire bracelets. I threw some colors into the bead spinner and away I spun in some zen-like beading trance. I needed a mental distraction for the evening. I think it's called procraftinating (that's procrastinating crafting). 


40+ bracelets later and my peanut seed bead stash almost depleted I started to formulate what to do with these awesome stacks of bracelet-y goodness. 

At first I thought I would make some tiny willow headpins to coordinate with them, but as I looked at my mountain of bracelets I realized they were the colors of the butterfly wings I had been creating last week. And so I whipped up some headpins to go with them.

And doing some further contemplation on what to do with 40 bracelets had me thinking of where I would sell them which led to a momentary dilemma. I would like to take some of them to our local Center for Arts where I have a collection of jewelry. 

I live in a small, conservative farming community that enjoys a crazy summer tourist season thanks to the beautiful shores of Lake Michigan. I've struggled with finding the right local venue and of course I could adjust what I make and throw on some tiny bead charms like the bracelet above, which would give me a lower price point and make them more sell-able. And it's a cute bracelet and all, but, meh...

It's hard to settle when I know adding these beauties to the bracelet will do some serious magic.

Wowzer, note to self: don't settle as a designer. Just don't!

Look at what I could have missed out on making if I had settled to make something just to sell them quickly. These are little works of art, these stand out, these are unique. These make my heart sing.

I will take some down to the local art center and work on marketing them there. But I will also sell them on my website where I can connect to those who are looking for something beyond the ordinary.  I just can't make things to fit the local market. I need to make things I love and then go out and find my market. My time is too limited to make things that are ho-hum.

July 16, 2014

Michael's Beading Challenge Blog Hop Reveal

So a few weeks ago I teamed up with my beady friend Lorelei Eurto for a Michael's Challenge Blog Hop.  Above are the beads we used for the challenge that I picked up from Michael's. We invited anyone who wanted to join in the fun to play along. Today we are sharing the results. I can't wait to see what everyone made!

This was my inspiration palette for the challenge. I really wanted to make a necklace to match the shirt in this photo.

My dear friend Erin made the pendant for me a few years ago, I have wanted to make myself a necklace with it since but just never made the time. Yeah for the blog hop, finally something crossed off my to-do list! 

I paired Erin's pendant up with the the pink beads knotted on teal waxed linen along with the window glass beads and white turquoise beads. The second strand of beads are looped together on steel wire and mixed with etched brass jump rings. That strand has Czech glass and those boho-inspired inlay beads. A Vintaj Arte Metal chain finishes the design with a simple toggle clasp.

A close up of Erin's pendant - she has the heart of a poet and includes the most beautiful sayings on her designs. You can see more of her work at Tesori Trovati

For the next necklace I pulled back the palette and selected only a few strands of the beads to work with for this design. The wood and ceramic beads from Micheal's Bead Gallery are mixed with a few of my new butterfly wing beads and an etched butterfly pendant. (Those were made for my retreat class projects.)

The necklace is knotted on brown waxed linen. I seem to always underestimate the linen to knot ratio and ended up having to redo one side when I realized I was going to run out of cord before I finished. This happens to me often. 

Both designs capture a great summer bohemian feel that I'm digging right now. I loved using the waxed linen and tried very hard to remember the knots that Erin Siegel showed me on last Bead Cruise. I'm still trying to perfect them! 

If you played along include your link using the InLinkz tool below. 

Have fun visiting the other participants today. 

If you are stopping by early in the morning, 
you might want to check back this afternoon or evening to see more links/blogs. 

Happy Hopping!