February 6, 2011

Picnik Photo Tutorial Part 2

First, if you missed the Rounded Photo Corners tutorial, check that out for some basic instructions on using Picnik. 

Today I'm going to show you a few more tricks for adding some life and interest to your photos. 

After you upload your photo to Picnik and resize it, head to the 'Create' tab.  Click on  'Effects' on the top tab and on the left hand-side of the screen you'll find some fun filters to try on your images.  Each one does something different - play around to see what filter will give the desired effect. If you don't like a filter, simply discard the changes before saving.

The Original Photo

Lomo-ish filter with rounded corners

1960's and Lomo-ish with rounded corners
You can combine filters for unique effects.  You might want to jot down what effects you use on a photo so you can duplicate the same style on other photos.

Gritty with rounded corners

Cinemascope without the letterbox and rounded corners

Same photo as above with the Cross Processed filter added.

Each filter has a different feel and tells a different story.  Altered photos can help you tell a better story on your blog.  In the 'gritty' photo I could see that paired up with a story about dealing with creativity doldrums during a long cold winter, where the '1960's/Lomo-ish' photo could accompany a blog post about nostalgia and creativity.
Do you Picnik?  What are some of your favorite tricks?

February 5, 2011

Finding Time to Create

Are you finding that you don't have the time to create or just feel like your inspiration has run dry?  I go through those times too and thought I'd share a few tips with you.

1. Schedule time to play - I know this may seem strange - schedule time for creativity.  You can't force inspiration to strike but if find the time to show up, you might find that inspiration is soon to follow.  Pick a day this month or once a week and say these four hours (or however many you can spare) are mine to have fun and play.  That's what I did with the Bead of Month Club - I gave myself one day a month to experiment and explore.  And the result was not only the BOM bead but a whole new line of spring-inspired creations.

2. Unplug - This is hard for me, but necessary if I am feeling really stressed and want to tap into my inner muse.  Go ahead - turn off the computer and Ipod, don't check your email for a day. I promise the world will not fall apart.  Sit down at your table, turn on your favorite music and let your hands go to work.  If you have a creative block, pull out an art or beading book or go for a walk.  But then go back to your work table. Or work on a mindless task for a for minutes until you feel warmed up - for me that is mixing colors.

3. Sleep - Seriously you feel more creative if you are rested.  I'm so guilty of not getting enough sleep.  But when I do, my mind is creatively solving problems and feeling all fired up to work on new designs. 

4. Chill out - Are you in a constant state of panic, putting out one fire after another or feeling overrun by your to-do list?  Ha - I just describe myself.  On these days there is not a creative bone in my body.  The cure?  Relax for crying out loud.  We don't have to be constantly stressed or under the gun of a deadline to produce amazing things.  Make a daily habit of meditating, going for a nature walk or praying.  All good for the soul and for feeding your creative muse.

Other suggestions for finding more time:
  • Skip watching TV.
  • Schedule a creative play day with a friend.
  • Delegate household chores.
  • Work with your spouse and set up a Daddy's Day Out with the munchkins. Use that time to play and for nothing else!
  • Consolidate your errands - bunch up your errands so that you aren't constantly running around.
Do you have any tips for finding more time in your day?  I'd love to hear them!

February 4, 2011

From Sketch to Bead

Most my beads start out as a sketch, doodled in one of my many sketchbooks.  I keep them all over the house - one by my computer, a few in the living room, one in my bedroom, you never know when inspiration will strike!  It also helps to sketch down an idea when you are busy so that you can revisit it later.  After I have a page of sketches I pick the ones I think are working and hand carve polymer clay molds.

Here I snapped photos with my Ipod as I worked on these.  The first step is painting.  Yes, I recycle scrap paper and use them when making beads!

I bake my paint into the clay and go through the process several times with various colors and coats.

When the beads are finished baking I antique each one with acrylic paint and sand them.  They are then coated with a wax finish to protect the paint.

Here are my two favorites.  Do you see them in the sketch?  I'm in love with navy blue at the moment.  Can not get enough of it.

The robin is inspired by my childhood in Michigan.  You could always tell it was spring when the Daffodils started to bloom and you spotted a robin in the yard.  I'm longing for both home and the green that comes with the new season.

February 3, 2011

Create Super Easy Rounded Photo Corners

I've been working away on redesigning my website.  It was looking a little dated and I knew with just a bit of photo magic I could really make the pages pop and hopefully inspire shoppers.  This is the homepage with nice rounded photo corners for the main categories.

On the Bead Shop page instead of a long list of beads to scroll through, I separated the beads into categories for easier shopping.  I love this page with the photos all jazzed up.  It sure makes a big difference.  I even rounded the edges of my banner to create a consistent look.  A few other tweaks included updating the banner on my blog too and changing the background colors on my website so that it matches with the blog.  Going for consistency with my visual elements here.

You can create rounded photo corners in 5 super easy steps with no expensive software required.  Head on over to http://www.picnik.com/ to make with the photo fabulousness.

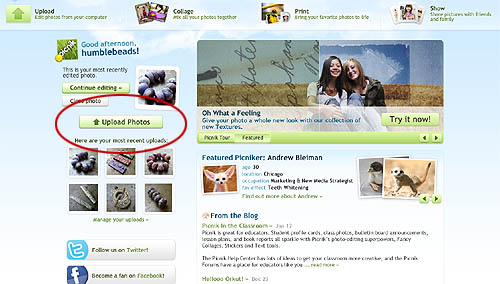
Step 1. Upload your photo.

Step 2. Your photo will be transported to the editing tab.  Here you can resize your photo to suit your needs.

*For blog or Etsy photos go with 600 pixels wide.  I wanted a smaller catalog image and went with 300 pixels.  

Step 3. Click on the Create tab.

Step 4. On the top of the website, click on "frames".  On the left-hand side you'll see the "Rounded Edges" function, click that.  You can adjust how large you'd like those corners. Hit the 'apply' button when you are done.

Step 5. Click the "Save & Share" tab.  Save the image to your computer. 

You can also share it on Flickr, Facebook, Twitter and more - depending on what you were using the photo for.

All roundy-mcdaisy.  How easy is that?  Go give it a try, you'll soon be fancyin' up all your photos!

February 2, 2011

Bead Table Wednesday - Oh Pretty!

Thanks for stopping by today for Bead Table Wednesday.  I'm showing vignettes today, because this whole room would scare you.  Like horror film scary.  I swear I hear the Halloween theme song or maybe the Psycho shower scene, cheng, cheng, cheng.  Anyway, trust me it's frightening and I did not want to have your running from your computers or worse, hanging your head in shame and tsking me!

Now that the book is sent off to the publisher (yeah!) I'm focusing on some projects for magazines.  Here are some sneak peeks of what I'm working on.  Above a nest pendants with a Green Girl Studio clasp and a faceted bead from Diane Hawkey.

Next up, short and sweet - pendant from Spirited Earth and spacer disks by me.

Oh how I love you etched metal pendant created by Jennifer Stumpf.  You are lovely beyond words.  Paired together with a Green Girl Studio nest charm and one of my acorns.

And last but not least, there are new beads on my bead table.  Oh, now wait - pick yourself up from the floor. I know it's been a while. 

I'm working on adding these to my website.  I've decide to take a little hiatus from Etsy and focusing on selling from my website for a few weeks.  So it will take me a day or two to finish updating the site - the new beads will be there in a few hours! 

So dear readers, what is on your bead table today?  I love seeing what everyone is creating.

Head on over to the BTW flickr group to share you mess or treasures - depending on how you feel or how tidy you are!