December 12, 2015

Accidentally on Trend

 
A week or so ago I spotted the Pantone Color of the Year for 2016. My first reaction to the baby blue and pink, uh - no thank you. And then I saw the spring color palette. Not for me.

But then, as I started seeing the colors everywhere, I couldn't help but notice how trendy and fresh the colors were feeling and that I hadn't really given then much of a chance. I remember feeling the same about Marsala last year. 

But then it hit me as I was looking at some of the entries for the Art Bead Scene's monthly challenge. Our inspiration painting this month was totally on trend in the color palette and color of the year for 2016. Kinda shocking considering the painting was created in 1951 by French artist Maria Helena Vieira de Silva. 


And later that same week I created these winter inspired wobbles and blam, totally the colors of our challenge and hey - is that Serenity Blue and Rose Quartz subconsciously stuck in there. Why yes, I think it is. And then I really started to look into the Color of the Year and spring palette with a new perspective and found a wealth of inspiration.

Here are two more color palettes I pulled from the inspiration painting. I went for a mix of grey and muted colors to balance out blue and pink.

For this palette I would focus more on blue/yellow combo with the pink and rust as small accent.

The HOLY GRAIL Pinterest Board 
for the Pantone Spring Colors for Jewelry Designers

100 pins of color combinations, patterns, art, fashion, jewelry and beads


I know it's not even really winter yet and I'm already jumping ahead to spring. But in a few weeks everything is going to be new year, new goals, new designs and you'll be so happy to have some spring colors to play to use in your jewelry.

So for this weekend only I'm having a flash sale on my website.

Use code COLORFLASH for 30% off your order. Sale ends Monday.
But check out the Pinterest board first for your inspirations!


So what do you think of Pantone's Colors of the Year? 
Did you take a look at my Pinterest board and have any different reactions? 

December 11, 2015

Jewelry Inventory

Some times I need a quick and easy way to share something online and today this blog is the best choice. So you get a big dose of eye candy and the shop owner that needs to see what I have in stock has an easy way to scroll through everything quickly. 

 Butterfly Wings: Teal, Blue and Pink

Dark Forest Pendant, Winter Owl Pendant, Dogwood Pendant

Acorn Pendants, Blue and Yellow.

Owl Charm Pendants

 Blue Bird Pendant, Cardinal Pendant

Nesting Pendant, Brown. Peace Pendant. Nesting Pendant, Olive Green.

Oak Leaf Pendant

Maple Seed Pendant

Snowy Mountain Pendant

Holly Pendant, small and large.

Fairy Garden Pendants.

Tiger Lily Pendant. Feather Pendant. Meadowlark Pendant. Blue Flower Pendant.  

Butterfly Wrap Around Bracelets, Purple/copper (4), Earthtone (2), Olive & Pink (2)

Butterfly Wrap Around Bracelets, Left: Purple (top) or Berry. Right: Bronze (top) Copper (2)

 Evergreen Cuff Bracelet

 Birch Bark Cuff Bracelet (large)

 Oak Leaf Cuff Bracelet

Birch Bark Cuff Bracelet

Oak Leaf Earrings: Purple, Dark Teal, Jade.

 Butterfly Charms: Purple, Teal.

Butterfly Earrings: Purple, Cream, Light Orange, Dark Orange.

Festive Earrings: Silver (3), Bronze (3). Nest Earrings (3)

 Ceramic Charm Earrings: Bird, Dragonfly, Leaf.


Birch Bark Earrings, various accent colors (5)

Maple Seed Earrings (3)

December 9, 2015

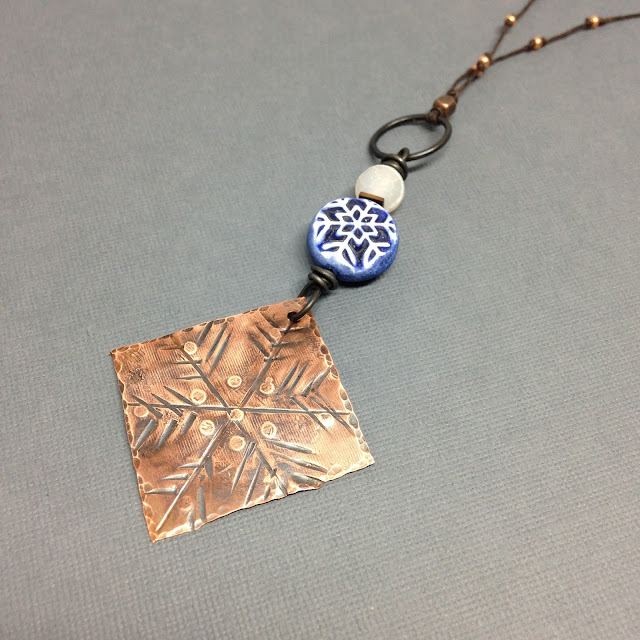
Ornament Blog Hop: Metal Sketch Snowflakes

I love making handmade ornaments. In fact, I have a tiny tree in my house filled with ones I've made over the years with special art beads. I also have handmade ornaments filling my tree and love giving them as gifts too. Art beads create instant heirloom status for a handcrafted ornament!


This year I made ornaments to celebrate the release of my new book, Beautiful Elements. The book features many projects using metal, hammers, tools and wire to create images or metal sketches as I've coined them in the book.

I added one of my snowflake coin beads to each ornament along with an icy looking stone. The hangers are waxed linen with copper seed beads. 

The evergreen one is featured on the Art Bead Scene. You can also enter to win a set of my snowflake coins over on there too!

Another ornament that has been getting created quite a bit in the studio is this snowy owl. Taken from a drawing in my sketchbook. I made one for my tree and have been sending them out to their new homes too!

Thanks for stopping by for a visit!

Head on over the Art Bead Scene to see everyone's creations and enter to win those snowflake beads.

November 8, 2015

Leather Bracelet with Micro Screws & Nuts Tutorial

Isn't it great to find a project that takes minutes to make but creates a big visual punch? Pair up my bracelet cuff with leather straps for a super simple project that is fun to wear and stack with other bracelet designs. Micro screws and nuts make this a no-fail project with very minimal tools and no riveting experience needed!
Supplies
Bracelet cuff
8” 19 gauge steel wire
2 15mm brass jump rings
10” leather strap ½” wide
18mm x 20mm copper E hook clasp
4 micro 1” screw and nut sets


Metal punch
Wire cutters
Scissors
Bench block
Ball peen hammer
Find leather, E hook clasp, jump rings, micro screw and nuts at Lima Beads
Bracelet cuffs from Humblebeads.etsy.com
Use 4" of steel wire to create a wrapped bail on the bracelet cuff. Repeat on the other side. 

1. Attach the 15mm jump ring to each end of the bracelet cuff.  Cut the leather strap in half. String one leather strap through the 15mm jump ring and fold the end of the leather strap over at 1/2” from the end. Punch a hole through the overlapped leather pieces ¼” from the jump ring. Make sure the punch goes through both pieces of leather. 

Tip: Always punch the hole from the top of the leather strap.

2. Thread the bolt through the leather straps with the finished end facing up on top of the leather straps.

3. Thread on the nut on the bolt on the back of the leather.

4. Use chain nose pliers to tighten the nut securely.

5. Trim off the end of the bolt wire cutters flush to the nut.  

6. Place the bracelet with the nut side up on top of the bench block, lightly tap the cut off end of the bolt with the ball peen hammer to flatten the end slightly.  

7. Measure the straps to fit your wrist with 1/2” extra leather on each side, trim leather to shorten if needed. Thread the closed end of the  E hook clasp through the end of one of the straps, fold the strap over and punch a hole a 1/4” from the clasp. Repeat step 4. & 5. to secure the leather loop.

8. Repeat step 7 on the other side of the leather strap, making a loop with the 1/2” of leather without inserting the clasp.


Order more leather, screws and clasps than you think you'll need because these bracelets are addictive and you'll want to whip up a pile of them!!!! 

November 7, 2015

Autumn Flowers Inspiration

The Art Bead Scene's challenge this month is a silk screen print by Marguerite Zorach.  With a background in printmaking this piece really called to me as labor of love from the artist. With the muted colors and modern design elements I knew right away that I would want to make beads inspired by the art. I printed this out and went to the studio to dig in and see what I could create. 

I pulled out some bead molds that reminded me the leaves, flowers and ferns in the painting and created them in autumn hues.

I mixed up some colors in polymer that matched the color palette I created for the ABS. (It will be on the blog tomorrow.) And pulled out some canes that fit the leafy theme for a very limited edition of these Autumn Floral disk beads. Love these! May have to keep a set for myself.


 Feathers in the navy blue and jade pulled from the print.


And I love the ferns stuck in the floral arrangement so I wanted to pull out these fern charms in the navy and copper hues.

I had this mold in the beadmaking stash from something I made years ago that never fit what I wanted for the project at the time. But when I was digging in those molds this week I instantly saw it updated in the new colors and knew it would be perfect. These are my favorite from this week's beadmaking adventures.  I love how they feel like a mid-century pattern. I'd love a skirt or scarf made with this design.

And looking at the inspiration print I couldn't help but think of my Bonbon beads. So I mixed up my favorite colors from the print and got to work on a new batch. Perfectly autumn, don't you think?

So that's what I created for this month's ABS challenge. I'm also a sponsor for this month's round and have donated a $50 Humblebeads.com gift certificate. I hope you'll play along this month!

New beads can be found in my Etsy shop.